
The Complete Roof Replacement Timeline: What Homeowners Should Expect
Replacing a roof is a major investment, and understanding the process can help homeowners feel more prepared. From the initial inspection to the final cleanup, here’s a step-by-step guide to what to expect during a roof replacement.
1. Initial Consultation and Inspection
Before any work begins, a professional roofing contractor will assess the condition of your existing roof. This inspection identifies issues such as leaks, structural damage, or insulation problems.
- Roof Assessment: A thorough examination of the roof to determine if a full replacement is necessary.
- Material Selection: Homeowners discuss roofing options.
- Cost Estimation and Scheduling: The contractor provides a detailed estimate and works with the homeowner to schedule the project, considering weather conditions and material availability.
2. Preparation and Planning
Once the contract is signed, preparations begin to ensure a smooth installation process.
- Permit Acquisition: The contractor obtains necessary permits to comply with local building codes.
- Material Ordering: Final decisions on materials are made, and orders are placed to ensure timely delivery.
- Property Preparation: Homeowners should move vehicles, cover outdoor furniture, and protect landscaping to prevent any damage during the process.
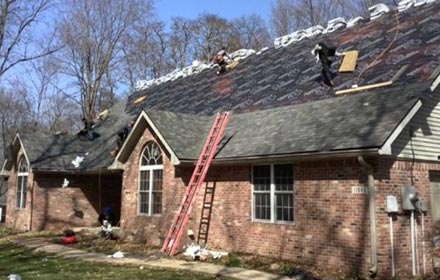
3. Removal of the Old Roof
The first major step in the replacement is removing the existing roofing materials.
- Tear-Off Process: Workers remove existing shingles, underlayment, and damaged decking.
- Deck Inspection and Repairs: The roof deck is examined for any signs of rot or damage, and necessary repairs are made before installing the new roof.
4. Installation of the New Roofing System
With a clean and solid foundation, the new roof installation begins.
- Underlayment Installation: A protective barrier is placed over the roof deck to prevent moisture penetration.
- Flashing and Ventilation: Flashing is installed around chimneys, skylights, and vents to prevent leaks, while proper ventilation is ensured to extend the roof’s lifespan.
- Shingle or Roofing Material Installation: The new roofing material is installed according to manufacturer specifications for durability and weather resistance.
5. Final Inspection and Cleanup
Once the new roof is installed, a final review is conducted to ensure quality and compliance with industry standards.
- Quality Check: A thorough inspection confirms that all materials have been installed correctly.
- Debris Removal: The crew cleans up all leftover materials, nails, and debris from the property, ensuring a tidy finish.
6. Post-Installation Support
After completing the project, homeowners receive the necessary documentation and maintenance tips to protect their investment.
- Warranty Information: Contractors provide warranty details covering materials and workmanship.
- Ongoing Maintenance Guidance: Homeowners receive recommendations on maintaining their new roof to maximize its lifespan.
Free Inspection and Estimate
Your home deserves a strong, reliable roof. If you’re considering a roof replacement, don’t wait until small issues become costly problems. Contact Wabash Valley Exteriors today for a free inspection and consultation. Our experienced team is here to guide you through every step of the process, ensuring a smooth and stress-free experience. Call us now or visit wvexteriors.com to schedule your appointment!